Deploying to Github pages with Travis

If you want to write a blog, or have another kind of static website, you need to deploy it somewhere. So why not host it on Github pages? It’s free and has https by default.
To deploy a website that gets generated, for example by jekyll, we need to make a few steps before we can deploy it to Github pages.
We need the following things:
- Two Github repositories
- Set up Travis
Two Github repositories
Because we want the code that ‘creates’ the website, and the website itself on Github, we need two repositories. The first one can be
whatever you wish to call it. In this example the repository will simply be called Blog. The second repository, which holds the website needs a special name.
This repository will be called <Your github user name>.github.io. So in my case it is called BackEndTea.github.io.
Once you have added some content to the Blog repository, and want to show it to the world, follow the next steps.
Set up Travis
Thankfully, creating a Travis account is as easy as going to their website, and clicking the Sign in with Github button. There you will find a list of all (public) repositories you have access to. Activate the one for Blog like so:

Now lets add a file called .travis.yml to the root of our Blog project, which will look like this:
language: ruby
cache: bundler

branches:
  only:
    - master

install:
  - bundler install

script:
  - bundler exec jekyll build

deploy:
  provider: pages
  skip_cleanup: true
  local_dir: _site
  github_token: $GITHUB_TOKEN # Set in travis-ci.org dashboard
  keep-history: true
  on:
    branch: master
  repo: <Your-github-name>/<Your-github-name>.github.io
  target_branch: master
Replace the language/install/script parts with what is relevant for your tool. Since this example uses Jekyll we need ruby, install the project with bundler,
and run bundler exec jekyll build to build the project, which puts it in the _site folder by default.
The deploy part is a bit more interesting. The provider key is pages, as we are deploying to Github pages. We set skip_cleanup to true,
as this would otherwise ‘clean up’ the freshly build website. local_dir is the folder to actually deploy. If we set keep-history to false,
every push will be force pushed, and the repository will have no git history. The repo is the Github repository to deploy to, which we created in the first step. And we deploy to master.
Now for the github_token. We go back to Github and go to our settings like so:
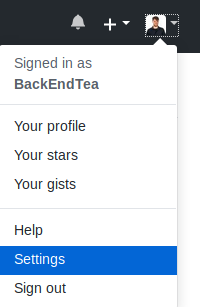
There you can go to Developer settings, and then to Personal access tokens. Click the Generate new token button, and give it the following permissions:
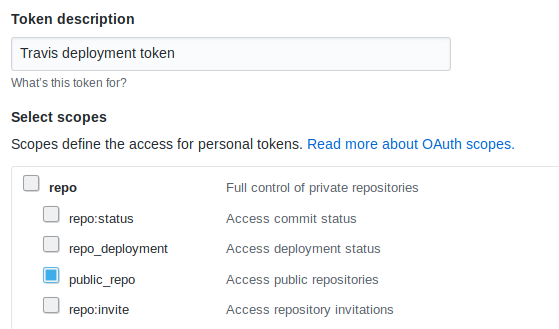
This should be the only permissions it needs.
Once you the token it will show you the token one time only, so don’t close the tab yet. Move back to Travis and go to the settings of your repository.
There you will see a section called Environment Variables. On the left is the key to access the value, and the right is the value itself.
The key here will be GITHUB_TOKEN, which is the same as we put in our .travis.yml, without the leading $. The value is the token we just generated.
Once you pasted it to Travis you will lose the ability to see the token. Thankfully, we no longer need the token ourselves, as from now on Travis will deal
with the deployments for us.
With our current settings, every time we push to master, our website will be re-build and deployed to Github pages automatically. As a note, don’t re-use your github tokens, and only give it the permissions it needs, and if you no longer use it, delete it. If the token gets compromised it could be used to make changes to your repositories and do a lot of damage.